A while back, I entered a FFA (Free For All) editing contest hosted by Adorama and Asteryx on Instagram. This was a juried contest that encouraged image manipulation and to create something new out of multiple amazing photos shot by @asteryx. I entered the contest and ended up winning the Grand Prize of $2500 and some other goodies from DJI and AOV! It was very unexpected and an amazing feeling (plus I was able to upgrade my camera because of it!) Many people have asked about the photo, so I figured I’d do a write-up on how it was created. I’m going to be focusing on a little bit of the “how”, but a lot more of the “why”. I’d like to create some tutorials in the future for some of the specific practices and techniques I use, but feel free to leave a comment with any specific questions. Here we go!
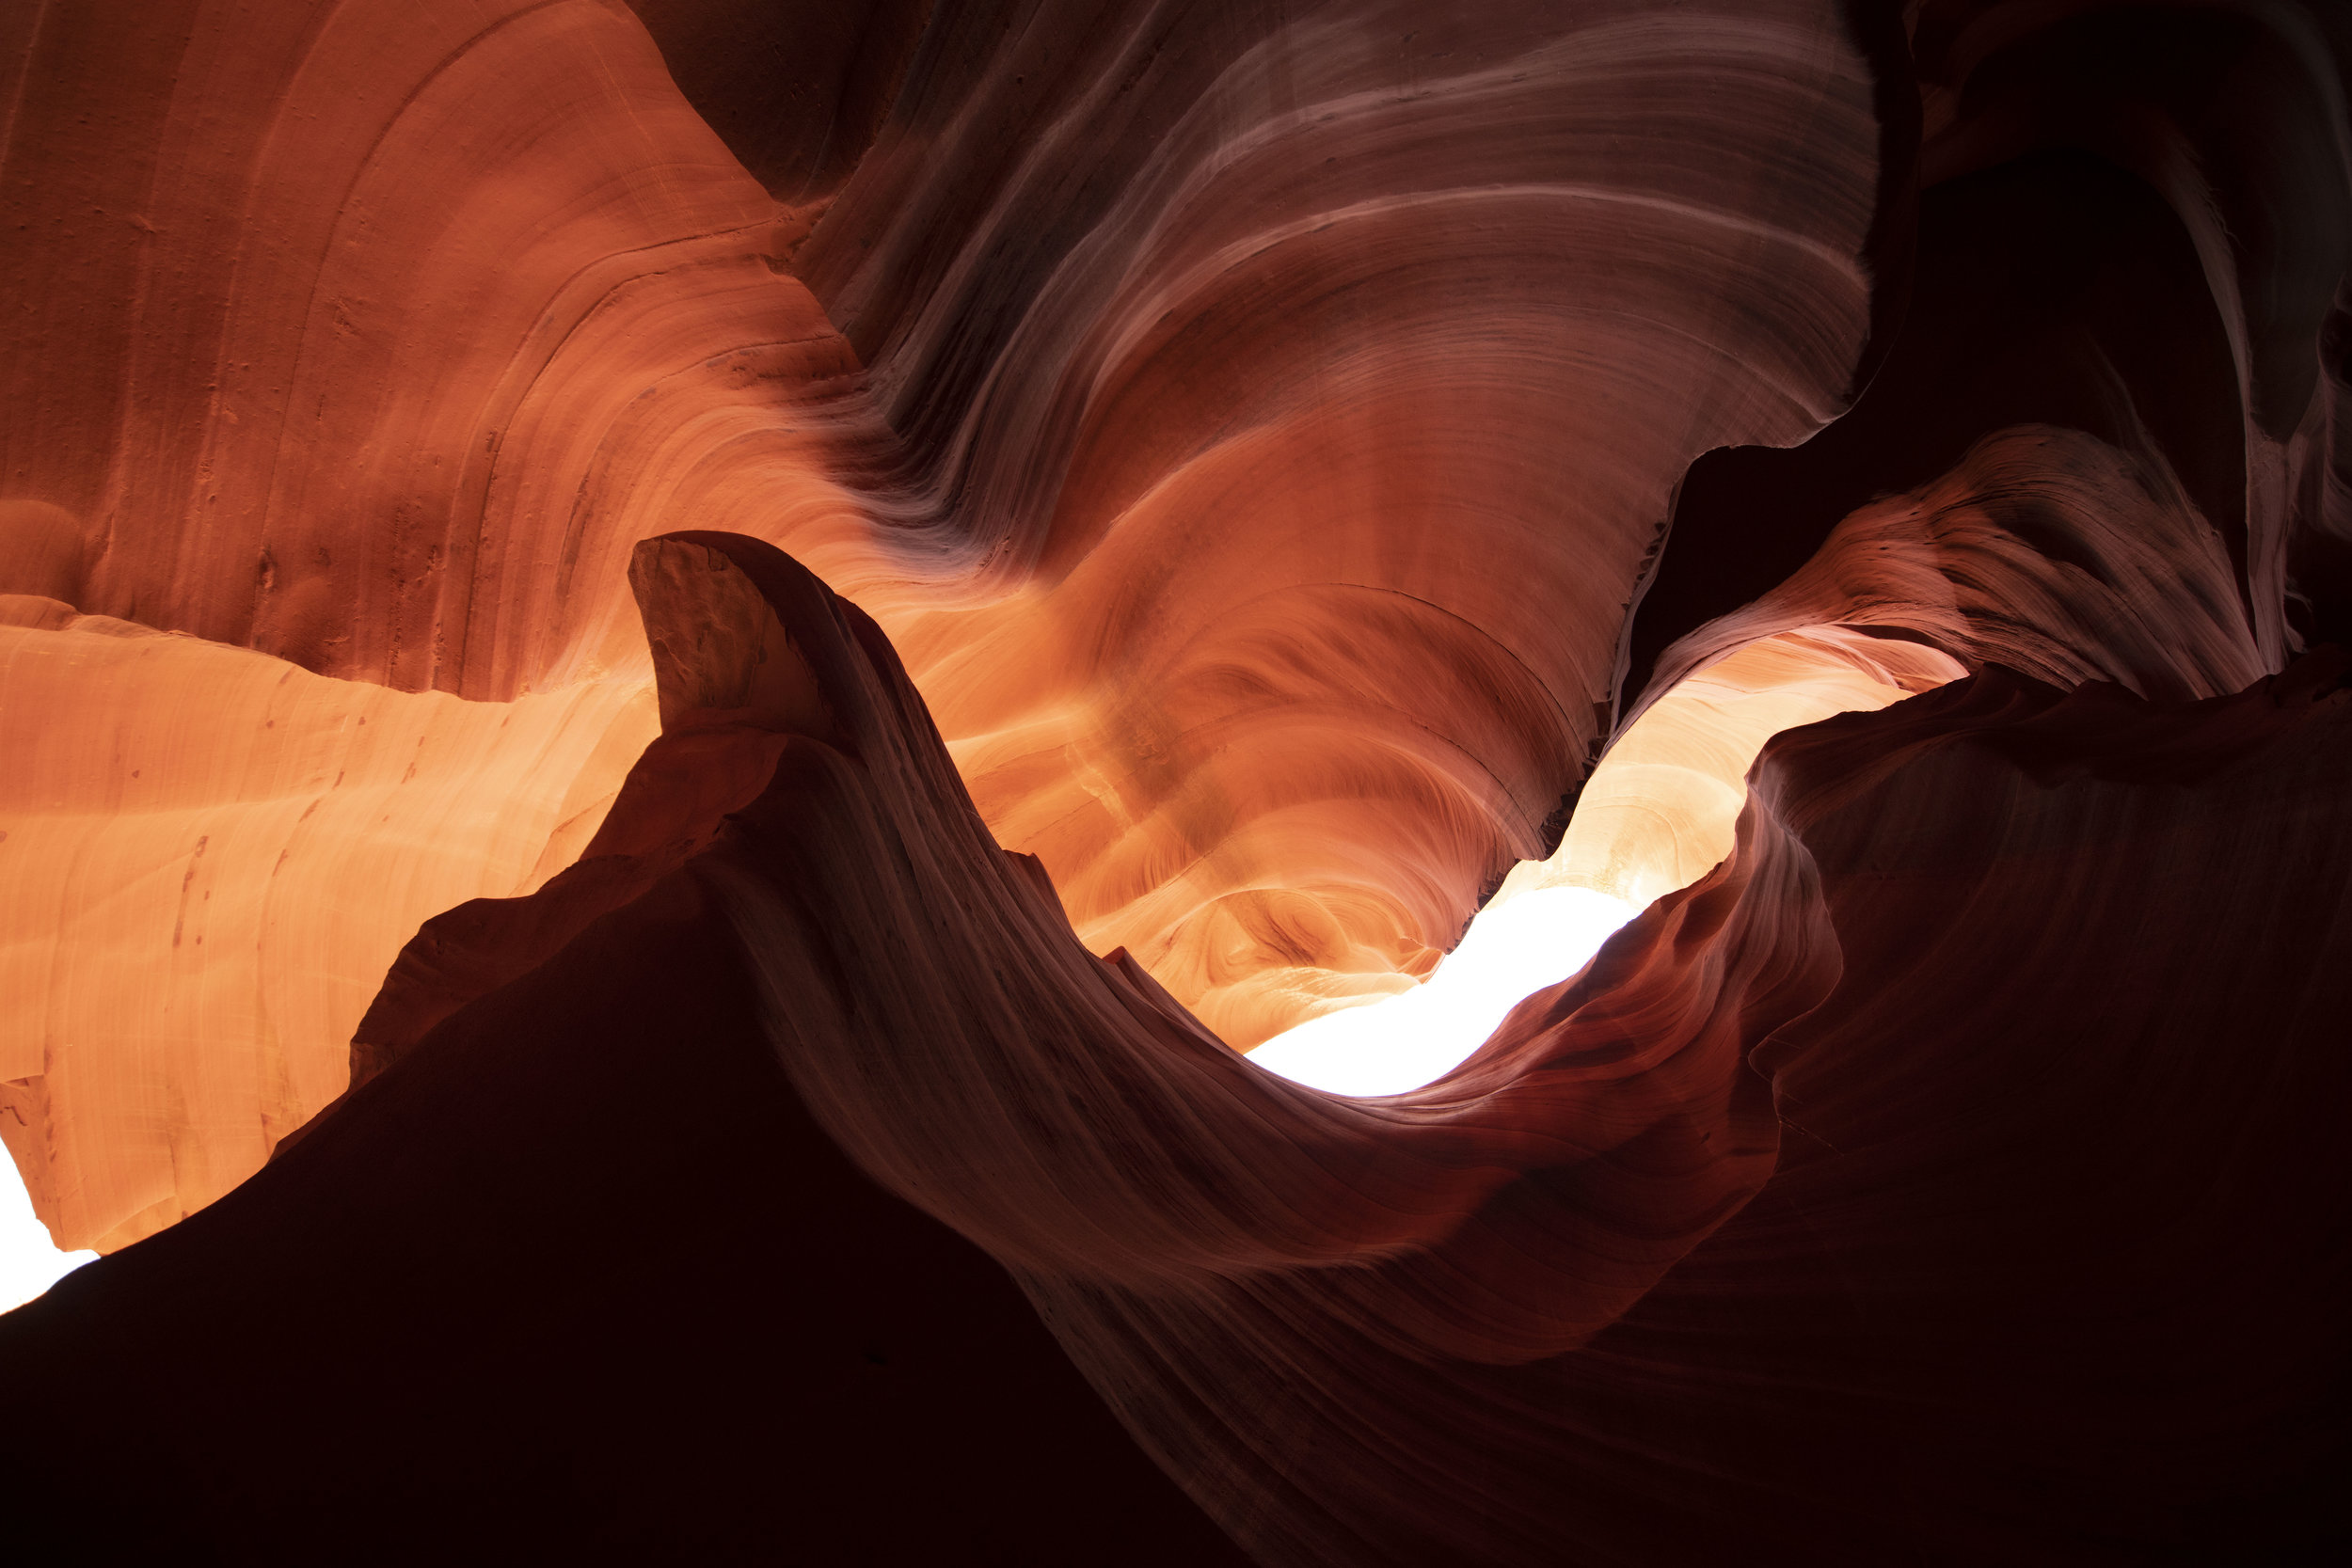
BEFORE

AFTER

The first thing I did to create this image was make two less-inspired entries for the contest. You don’t always make the best image the first time, and I think that’s true with most things in photography.

I enjoyed creating these images, but they didn’t stand out amongst the other entries. I started looking at the photos again to see how I could put a creative spin on them.

This photo caught my eye because there is no real sense of scale. People who have been to Antelope Canyon and similar places know a slot canyon’s general size, but looking at this photo, there’s no way to tell. How tall is this canyon? Are we looking up or straight ahead? There’s an abstract-ness to this photo which is great for creating something new. Instead of people knowing exactly what they are looking at, you get to make it up and tell them what they see.

Flipping the photo on it’s side, the scene changes and a horizon presents itself. I also loved the soft light on the bottom half of the photo and thought it would be compliment a sunset well. I made a 4x5 canvas in Photoshop, cut out the rock formation with the pen tool and chose a photo with some appealing clouds for a backdrop. To make the image look like it was taken at sunset, I added in the sun from another photo, some brighter clouds from another, and set a few radial gradients to “Screen”. This created a more direct light source for the photo. I also added some slight gradients to the top of the image.


Next, I wanted to make the image look less two-dimensional. The solution? Add some depth throughout the image. I cut out, rearranged and resized parts of the original slot canyon photo to simulate closer and further rock formations. I also made them lighter or darker depending on distance from the “camera” and their lighting environment. This sounds complicated, but it’s very easy to observe in person and replicate. It’s also something used in painting. The further something is from you, the less detailed it becomes. You also lose color and tones lighten as objects recede into the distance. This is known as “Aerial Perspective”.
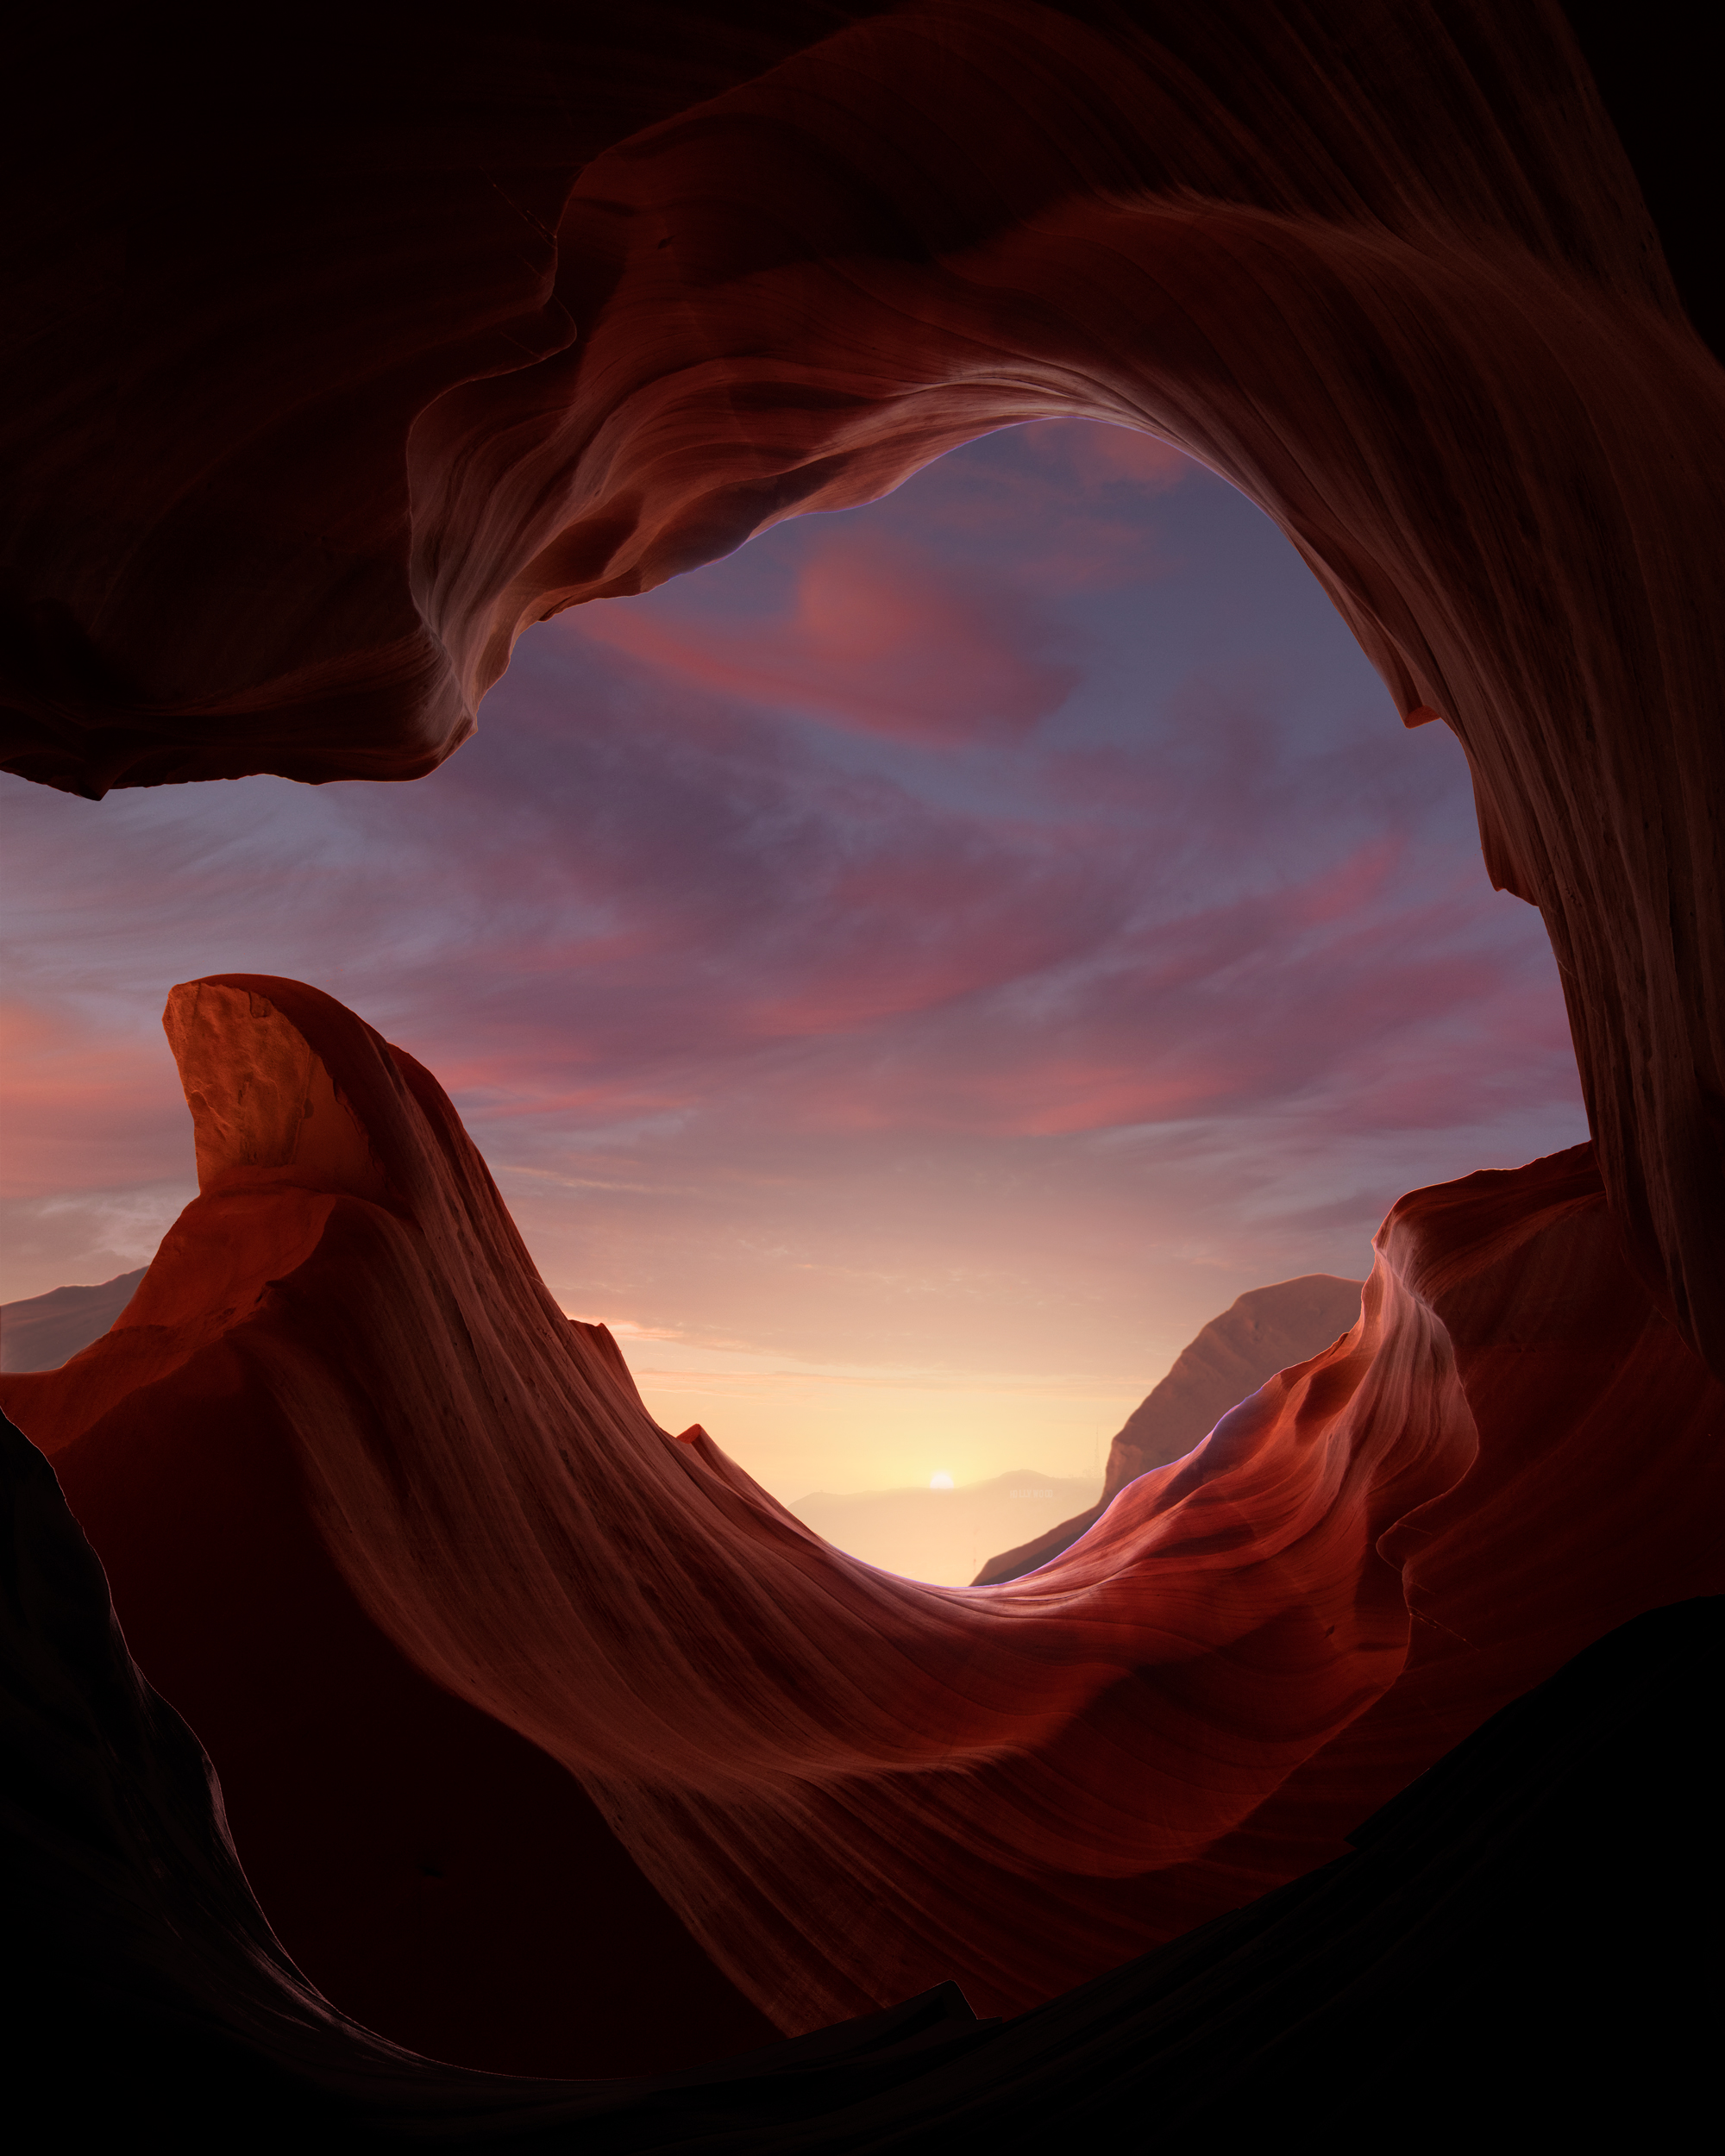
That makes a world of difference! Now it’s time to introduce a component of scale to our image, and the best way to that is by adding in an object we can compare with the surroundings. The human form is one we know well and is a great way to show scale.
I took the woman from the last photo and placed her in a spot I felt would be a reasonable place for someone to sit, darkened her so she would appear a bit more silhouetted, and also added a shadow to highlight the light source and make the image more realistic.


A few more radial gradients, a slight vignette and some curve adjustments and the image is complete!

Overall, the comp took about 5 hours over a few days. Creating something worthwhile always takes time and I’d encourage anyone attempting things like this (or anything) to not get discouraged if your work doesn’t look how you had planned at first. Things like this grow and evolve and after putting in the time, something unique will come to life from the ashes of your mistakes. Feel free to leave a comment with any questions and I’d be happy to answer them, and look at for more walkthroughs, tutorials, trip reports and blogs coming soon! Also feel free to subscribe below so you don’t miss one!
Lastly, here’s some other entries and runner-ups that I think deserve some recognition! All three of these creators are amazing and I highly recommend you check out more of their work!


Thanks for reading!